Daily Inspection Steps for Worn Square Woven Screen
If you’ve ever been halfway through a 12-hour production shift when a hidden worn spot on your screen suddenly tears open, sending oversize material downstream to contaminate your whole finished product stockpile and derail your entire week’s shipping schedule, you know exactly how much unaddressed, uninspected screen wear can cost your operation in wasted product, unplanned downtime and angry customer complaints. Many plant maintenance supervisors I’ve worked alongside over the years shared that they used to only check their screens during full changeouts, until a series of unexpected mid-shift failures taught them that a quick 10-minute daily inspection can catch 99% of these failures weeks before they happen. This practical, field-tested guide skips generic marketing talking points and breaks down exactly how to properly inspectworn square woven screen, using simple actionable steps that your team can start implementing today, no specialized testing equipment required.
First Step: Full Deck Visual Walkthrough for Obvious Damage
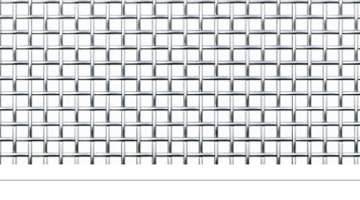
The first and most important part of the process when you inspect worn square woven screen is a slow, methodical full deck visual walkthrough, done with the machine locked out, all spray water turned off and the deck fully cleared of any leftover material that could hide damage from view. Many teams rush this step, standing at the edge of the deck and glancing across the surface, which means they miss small 10mm to 20mm partial wire breaks that are hidden under thin layers of leftover fine dust and dried slurry, until those small breaks tear open into massive full panel holes during production. You should start at the feed end of the deck where wear is always heaviest, then slowly work your way all the way to the discharge end, checking every single square meter of the mesh surface for partial wire breaks, small tears, stretched distorted apertures and shiny polished wear spots where the wire has been scoured thin by thousands of tons of passing material. Most teams that started doing this slow, careful full visual walkthrough reported that they found 80% of all developing screen failures at least 3 to 5 days before they would have turned into catastrophic mid-shift tears.
Second Step: Edge and Hook Tension Point Close-Up Check
The second critical, often overlooked part of the process when you inspect worn square woven screen is a targeted close-up check of all the panel edges, tension hooks and bolt connection points, which are the most common spots for hidden fatigue wear that never shows up in a general surface visual check. The edges of every woven screen panel see constant repeated flex and tension stress every single time the deck vibrates, so tiny micro-cracks and partial wire breaks start forming at the hook edge long before any visible wear appears in the main central mesh body, and these hidden edge failures can tear the entire panel loose from the deck in a matter of hours. You should run your gloved hand gently along every single hook edge and tension strip, feeling for sharp broken wire ends, loose wiggling wires and gaps between the hook and the deck support rail, while also checking every tension bolt to make sure none have loosened up and released the panel’s tension. Many operations that added this targeted edge check to their routine found that they eliminated 70% of all sudden catastrophic hook tear failures that used to happen with zero advance warning.
Third Step: Aperture Uniformity Test to Catch Hidden Wear
The third practical step when you inspect worn square woven screen is a simple aperture uniformity test, which catches subtle, evenly distributed wear across the whole deck that you cannot spot with just a visual glance, but which has already ruined your sizing accuracy. After 2 to 3 months of continuous operation, the constant abrasive scouring from thousands of tons of passing ore or aggregate will slowly wear down the thin wires, making every square aperture slightly larger than its original designed dimension, to the point that oversize material starts slipping through and contaminating your finished product, even if there are zero visible tears or broken wires on the panel. You do not need any expensive specialized tools to test this: you can simply take a sample of your finished product that you know should be 100% on-spec, and run it across a small section of the deck during a scheduled stop, or use a set of simple graded test gauges to check the actual open size of the apertures across the feed, middle and discharge sections of the deck. This quick test will immediately tell you if the average aperture size has drifted past your maximum allowed separation tolerance, so you can schedule a planned changeout before you end up producing hundreds of tons of off-spec finished material.
Fourth Step: Underside Support Bar and Mesh Contact Inspection
The final most often missed step when you inspect worn square woven screen is a quick underside inspection of the mesh and the support bars, which reveals hidden wear patterns on the bottom of the wires that are completely invisible from the top side of the deck. The bottom surface of the woven wires that sit directly on top of the deck’s support bars wears down far faster than the top surface exposed to the material flow, because the constant high-frequency vibration creates a sawing action between the moving mesh and the stationary support bar, wearing a deep narrow groove into the underside of each wire that will eventually snap the wire completely in two. To check this, you can simply kneel down beside the deck and lift the edge of the panel slightly to peek at the contact points between the mesh and the support bars, looking for deep shiny worn grooves on the bottom of the wires, and checking the support bars themselves for sharp burrs that are accelerating this wear. This simple check lets you catch developing hidden underside wire fatigue 1 to 2 weeks before any wire actually breaks.
A consistent, repeatable routine to inspect worn square woven screen does not require expensive tools or huge amounts of extra labor, but it will catch almost every avoidable screen failure long before it causes unplanned downtime, off-spec product or expensive downstream equipment damage, extending your average screen service life by 20% and cutting your total annual screening-related operating costs by more than 40%.