Piano Wire Screen Install: Field-Tested Workflow and Safety Rules
If you’ve ever pulled an all-nighter to swap out a worn fine screen right after a weekend full of breakdowns, you know how easy it is to rush the job, skip a couple small steps, and think “it’ll ho-ld fine“, only to roll back in on Monday morning and find half the wires sagging, a tension bolt lying loose on the floor, and a close call where a snapped wire nearly nicked the guy on cleanup duty. I’ve worked side by side with dozens of maintenance leads at mines, coal prep plants and aggregate quarries over the years, and almost every single one of them has a story about a lazy install that blew up 3 days later, wasting hours of production and a brand new panel. We built out this no-BS, field-tested piano wire screen install workflow and safety rules the hard way, tweaking it across hundreds of changeouts to cut out the guesswork, keep everyone safe, and make every panel last as long as it’s supposed to.
Lockout, Walkaround and Pre-Work Safety Check
First off, no one even touches a single bolt until every last person on the crew has their own personal lock on the main power isolator – no exceptions. You don’t ever want to be the guy who’s halfway under the deck when someone else hits the start button by accident. Once everything’s fully locked out, grab a stiff broom and sweep every last rock scrap, broken old wire bit and caked dust pile off the deck, then run your gloved hand along every single support bar to file down any sharp burrs or rough weld spots that could scratch the new piano wires and create weak spots that snap later. Hang big, obvious “WORK IN PROGRESS” signs at every single control station, make sure everyone’s got cut-resistant gloves, safety glasses and steel toes on, and do a quick headcount to make sure no random visitor wandered into the work zone. This 10-minute boring check stops 99% of the stupid, avoidable injuries that happen during screen swaps.

Pull Old Panels and Scrub the Deck Down Properly
The second part of a solid piano wire screen install is yanking the old panels out slow, not prying them off with a crowbar like you’re tearing down an old fence – that’s how you bend the tension rails and ruin the whole deck for the new panels. Loosen every tension bolt on both sides in tiny half-turns, hopping back and forth across the rail to let the tension release evenly. If you crank one side all the way loose first, a tight old wire can snap out unexpectedly and take a chunk out of your arm. Once all tension’s gone, lift the old panel right off and carry it all the way out of the work area, so no one trips over it or cuts themselves on the sharp worn edges. After all old panels are off, grab a wire brush and scrub every bit of caked mud, rust and old rubber seal gunk off the tension rails, then dab a little anti-seize on the bolt threads – that’ll make your next tension check 10 times easier. No weird hidden rough spots left to mess up the new panel.
Drop New Panels In and Tension Them Evenly, No Shortcuts
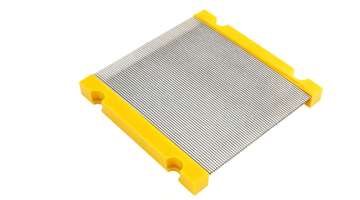
This is the part most guys mess up, and it’s the number one reason panels die 3 weeks early. When you do a proper piano wire screen install, you never drag the new panel across the support bars – that scratches the smooth wires and creates little nicks that turn into break points later. Set it down gentle, line the hooks up perfectly on the tension rails, and make sure the little rubber seal strip sits flat against the deck frame, no gaps that fine material can leak through all over the floor. Once all panels are sitting right, hand-tighten every bolt just enough to hold them in place, then grab a torque wrench and tighten them in a crisscross pattern: start at the dead center of the panel, do one bolt on the left, then one on the right, work your way out to both ends, until every single one hits the exact torque number you wrote down for your site. Go back around a second time and re-torque every bolt – half the time you’ll find a couple that loosened up while you were tightening the ones next to them. Take 2 seconds to glance at every wire: no sagging, no wires pulled so tight they look stretched thin. That’s how you make sure no wires rub through on the support bars or snap from fatigue.

Test It Slow Before You Crank Full Tonnage
The last thing you do before you call the job done is run it through a full test sequence, not just flip the switch and walk away. Get all your tools off the deck, get every last crew member clear, take your lock off the isolator, then bump the machine on for 10 seconds just to make sure it’s not rattling weird and no panels are sliding around. Let it run full vibration with no material for 5 minutes, then lock it back out, climb up and double check every tension bolt is still tight, no hooks slipped out of place. Once that’s all good, start feeding material at 30% speed for 10 minutes, don’t just dump full tonnage on it right away. Come back 30 minutes after you ramped it up to full load, do one last quick walkaround to make sure no fine stuff is leaking past the seals. That 15-minute test catches every tiny dumb mistake before it turns into a 2am breakdown.
Following this practical piano wire screen installation workflow protects your maintenance crew and prevents premature panel failures. Proper safety lockout, careful panel fitting, uniform tensioning and staged load testing help achieve the full rated service life of piano wire screens.